Senior Project - Metamorphosis
- Olivia Wesling
- Sep 2
- 9 min read

Updated: Oct 21
Posts are arranged newest to oldest.
Oct. 19th
Updated Light Test.


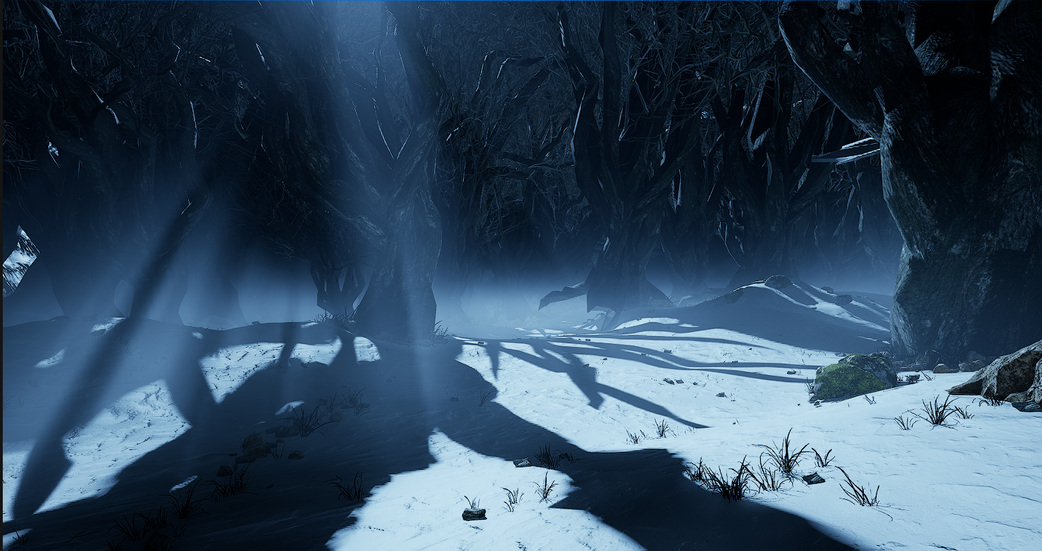


I started to see what colors looked best in this environment. I also found out that the fog really helps with the creepy factor.
Now I was talking to others and I think the next thing I need to focus on is figuring out compositing and researching more ways to intergrate the LED stage/Unreal with green screen shots.
Oct. 15th
Test Shoot
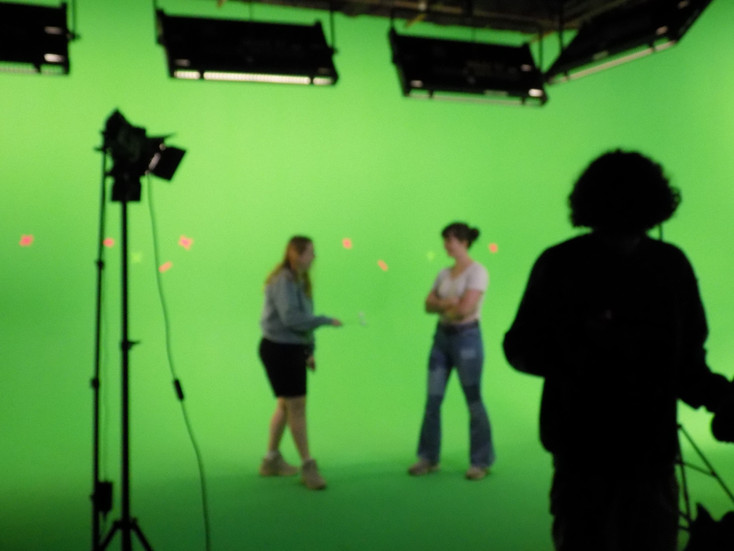
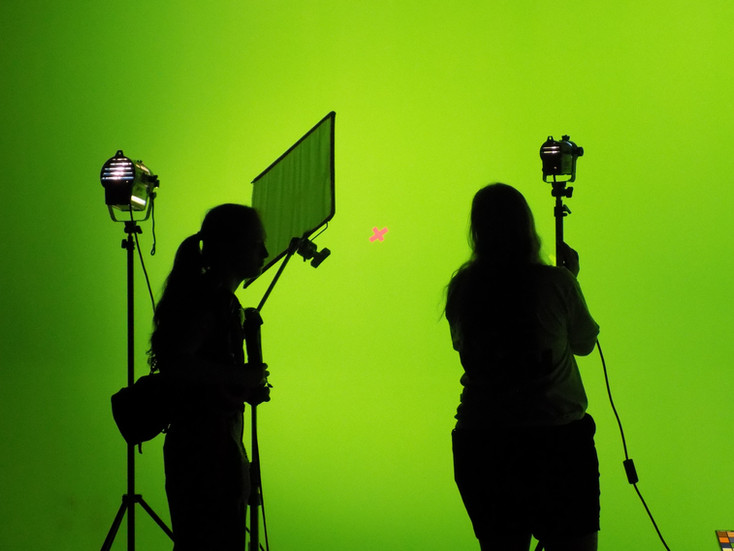
On October 4th, we had a test shoot day. We rented a greenscreen, camera, lights, etc. Filming shots that we knew we could get on a simple green screen. This was we could test our pipeline and get our toes in the water a bit more. This test shoot helped us realize what we needed to change; what we need to film on greenscreen or XR stage, as well as shots we need to adjust.
Here is some of the BTS from that day. On the day, I was the grip/gaffer, setting up the lights, making sure they properly lit the subject. We also ran into the problem of the lights not being able to change hue, so we couldn't get the right color of the moon that we needed. The 2 lights that did change were not enough. In the future, we need to have one big heavy light to properly light the subject as it would be lit in the environment.


After getting the shots we needed. Sydney and I split up the shots, doing a very quick comp of each to see how it might look in the environment.
COMP WORK
If I am being honest, it has been a hot minute since I have touched Nuke. So I followed a very basic Nuke setup for keying that I could use to refresh my memory.
Using Core Key and Edge Key techniques.
For Core Key, set up a Key light, getting rid of the green screen. Then, using an Erode node on the alpha chanel to get rid of any holes that might be in the middle of the actor. Then using a blur node to make the edges of the silhouette blended. Then merge the keylight with what you have created with the Erode and Blur nodes.


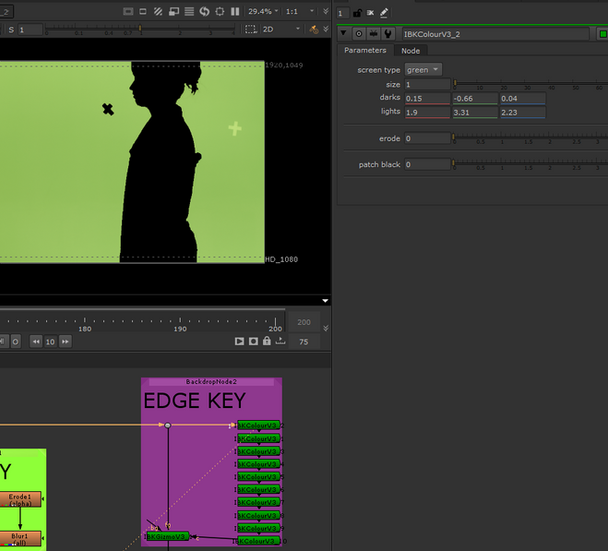
Next is Edge Key.
For this, I used IBKGizmo and IBKColour. Setting the IBKGizmo's screen type to C-green and colors set to 0,0,1. Then, for the IBKColour, again set the screen type to green and the size to 1. And adjusting the dark and light values. Then copy and pasting the same node, but each time you paste, adjusting the patch black by doubling the last number so for example, 0, 1, 2, 4, 8, 16, etc. So by the end, there is no more actor on the screen.

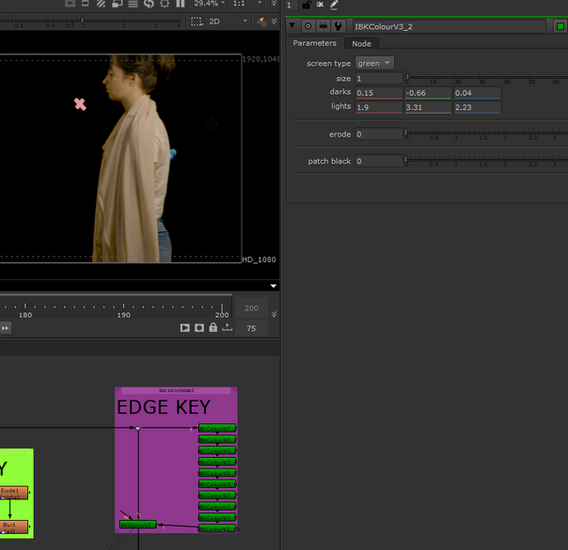


Then merge the Core and Edge key. I also went ahead and rotod out tracking points. Then, after I copied that to the original read in clip (after denoise), then putting down a premult and color correct to fix green. The final thing is to merge that over the background.

Here is what the final alpha looks like:
Now I know this isn't a good composite; it was done to just get a concept of what the scene might look like.
I am trying to learn more ways to key a green screen, so look out for my progress on that :)
Sept. 23rd
NEED TO DO:
Continue Previs/Lighting test
Previsualization Tests
As a help to start the process of creating this amazing project, I wanted to create some of the previs of the lighting in Unreal. Again, I am no usual user of Unreal Engine, so I am trying my best to learn the program and the lighting in the software.
I started with all the things I previously learned: Fog, directional light, BP_sky_sphere, and fog height. I want to go with a dark blue light to emanate a scary, dark ambiance.

I do kind of want the forest to be darker and definitely have more trees for a denser forest.


For the lighting in shot 1B I wasn't sure if I wanted to go with a warm or cool light. Warm light would help warm the cocoon for the fairy to pop out of.
I want to figure out the lighting on the cocoon. Maybe the light comes from inside of it right before the fairy comes out.
Sept. 14th
NEED TO DO:
make foliage resemble our project
test practical lights
Add fog in just the tree line/denser fog
Help create models
LIGHTING TESTS
I am one of the compositors on this project, but since we are in the early stages of development, I wanted to learn more Unreal Engine and do some lighting tests in Unreal.
I have very little experience in Unreal Engine, so getting a deeper understanding of how to control and use Unreal is important.
I started out by researching "Moonlight in Unreal", gathering tutorials and examples of lighting in Unreal. I also went ahead and gathered information on how to light a night scene in general. I found lots of helpful articles and video explanations. One specific tutorial caught my eye. "Lighting a NIGHT-TIME exterior in Unreal" by William Faucher.
Following his tutorial/explanation I learned that typically when shooting a night scene, the crew uses a big directional light and color corrects the scene in post making it look more blue.
Back to Unreal learning with help of the tutorial.
1 step was to have a scene that I could look at the light correctly. I opened an already created landscape, and I added some cubes and spheres. But I thought that wouldn't show the shadows that the tutorial had. I got some content from FAB which is epic game's "online store", downloading free foliage which would give me better shadows.

Once I had my "scene", I added a BP_sky_sphere. In the details section on the right, change the sun height in the negative direction to create a night sky. You can also change the star brightness in that detail section as well. Then adding a directional light, clicking ctrl+L you can easily change the light direction.

I was digging through the files of the foliage I had downloaded taking notice that the creator of the foliage had already had a scene roughly put together. I opened that and deleted all the lights to start from scratch. Once you put the BP_Sky_Sphere and directional light, I added the Exponential height fog, and in the detail section turn on Volumetric Fog.


Without fog With fog
From there I experimented with all the different fog settings; from density, height falloff, scattering distribution, etc. You can also change the settings in the directional light; the intensity, light color, indirect lighting intensity, volumetric scattering intensity (effects fog), etc.


Without fog With Fog
Then I started to mess around with color of the actual light.
Purple, Blue, Teal, White.


I really like how the blue and teal colors turned out. I also added in cubes in the far back to block light. William in the tutorial explained how you can shape the light and the fog in a particular way that the rays look exactly how you want them. The cubes just cut out the light creating more shadow in the back for a better look.
I think in the next time I experiment I would add better foliage that resembles more of what our project will look like. I also would love to add practical lights to see how that effects the scene. But for a start on lighting test. I really enjoyed this and want to dive in deeper to see what else I can create with the light.
Sept. 2nd
NEED TO DO:
Wait for feedback from class.
Gracie has a great blog that shows what the creating of the story has been like:
I have helped the team with voting what script we wanted to use. Landing on the final version: calling it Metamorphosis.
Here is the Script we have so far:

Comments